Last spring, I administered a short questionnaire to a gathering of church music leaders at a worship conference in southeastern Tennessee. I received 28 responses from this preliminary survey which yielded some interesting results:
57% regularly use orchestral string, wind, or percussion instruments in their worship services
On the other hand, 43% typically use only organ, piano, guitar, and/or drums in their services
About a third (29%) have a church orchestra
39% use orchestral instrumentalists who are 22 years old or younger
Only 14% use orchestral instrumentalists under 18 years old
When asked what they could use to “help your church to include or better involve orchestral string, wind, or percussion instrumentalists in your services,” they responded as follows:
64% would benefit from expertise or training for instrumentalists in their church
39% could use expertise or training for those in leadership
36% cited the need for more time or additional staff
Finally, nearly one-third (29%) of church music leaders said that college age and younger youth “rarely” or “never” participate in leading congregational worship in their church in any way.
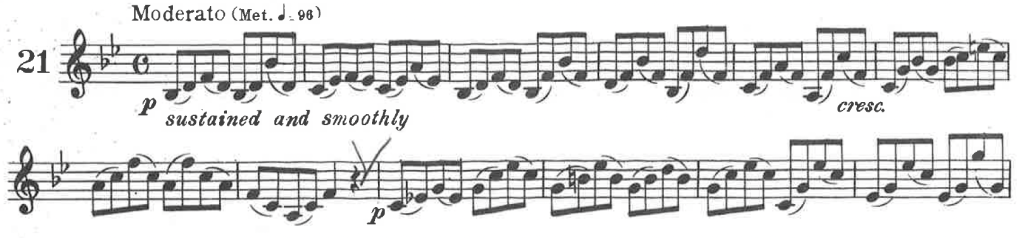
Learning a variety of scales is essential for all successful instrumentalists. These are the building blocks of our music-making. It is never too early to start learning scales. In fact, it’s the perfect place to start! Why??
Almost all music is created with a limited collection of pitches. When these are arranged in order you get a scale!
Practicing scales builds the motor coordination needed to reliably produce pitches in musical time.
Scales help our ears connect with the different roles that each pitch plays within the context of a key.
Scales can be used to strategically extend range both higher and lower.
Even young students are able to play in many more keys than most teachers realize. This builds confidence and prepares them to approach keys with more sharps or flats without fear.
Once a student knows a scale, it can be used to develop any number of techniques when strategically varied, such as with articulation and dynamics.
In my teaching of beginning students, I start out with a five note scale from C to G. Once that is achieved, I add one note to the top, progressing slowly so as to develop a good sound and to discourage tension. It may take several weeks or months to play up to a full octave. That’s okay. I then use the Beginning Scale Sheet below to move students through several keys, developing both range and familiarity with different fingering combinations.
A few other suggestions:
A steady tempo, no matter how slow, is essential for learning scales. Playing them out of time indicates poor motor control and renders them useless when applied to real music.
Pay attention to breathing. Encouraging students to play in one breath will promote reliable control of both the fingers and the air. This inevitably results in better sound production. At first, strive for just going up or just going down in one breath. Then, aim for up and down in one breath. Surprisingly simple goals like this provide excellent motivation for young students
Practice scales, first slurred and then tongued. Slurring eliminates the challenge of coordinating the tongue along with everything else. But articulation should be added soon so as to develop an immediate release of the air and coordination between tongue and fingers.
I use scales along with lip slurs to develop range in different ways. They also present two interrelated ways to approach the trumpet – one based on moving within a partial using valves and the other moving across partials with only the air and lips.
Unfortunately, many beginning band methods introduce only a narrow selection of keys and scales in the prioritization of other things. However, I find it incredibly empowering for students to learn multiple scales. It primes them for what is up next. If you really want to open up the doors for more repertoire, greater technique, and a true freedom of expression, scales are essential!
1) Breathe through your mouth – You just can’t get enough air through your nose quickly enough. Plus, in through the mouth sets up a reflex that is logically followed by exhalation through your mouth.
2) Breathe in time right before you play – At an early age, students should be taught to breathe in time right before they play. Mark in breaths to breathe in time between phrases.
3) Your air has only two speeds, IN and OUT – Be careful not to stop the air between inhalation and exhalation. It should feel a lot like a wind up and a pitch, throwing a ball with in one motion. Stopping in the middle will often cause tension or obstruction.
4) Keep center of your lips on mouthpiece when breathing in – Dropping your jaw for a “big breath” or otherwise needlessly removing the mouthpiece from contact with your lips will delay the release of your air. Even more importantly, if you don’t keep your lips close they will not be prepared to vibrate.
5) Breathe in through corners of mouth – This goes along with the previous piece of advice. I tell my student to imagine their lips are in the shape of a sideways figure eight or infinity symbol: ∞. Lips are touching in the middle and corners relax to bring in air. Notice this breath as a great example:
(Set playback speed to .25 to study the position of his lips on intake.)
6) Breathe in across your tongue – Practice this by breathing in while raising/moving forward the front half of your tongue enough to feel cold air rushing against past. This provides something for the lungs to draw air against and sets up your tongue for an effective playing position in most registers. It also prepares tongue to release the air immediately. Without this, you may inadvertently close your throat, constricting the flow of air and creating a point of tension that is not helpful for playing. Notice in this video how the player’s tongue comes forward for a good breath and to prepare for the subsequent articulation:
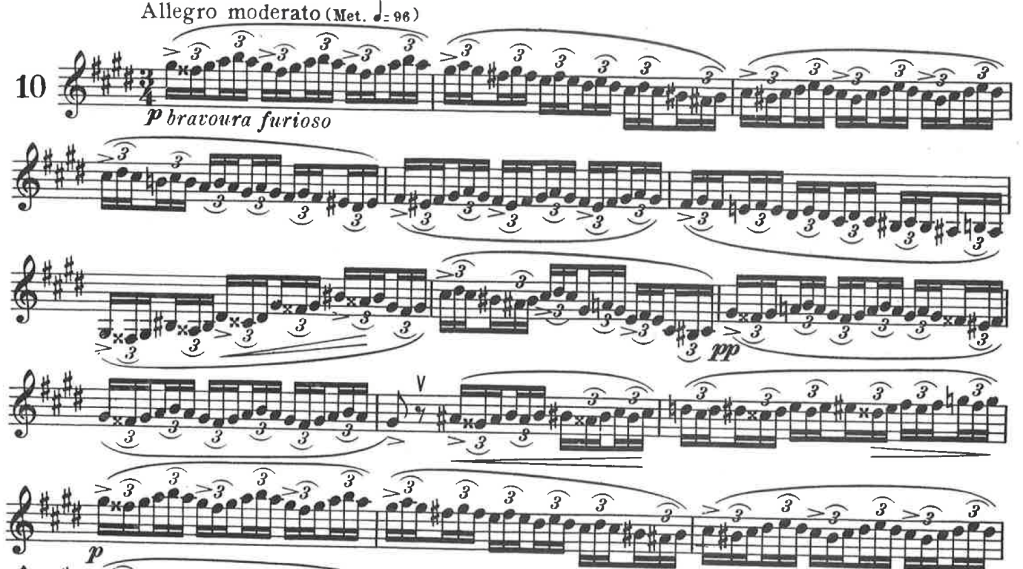
In the introduction to his Characteristic Studies, Clarke alludes to his source of inspiration for his etudes:
…I made a thorough study of violin methods and exercises, and adapting much of the material I found therein, for the needs of Cornet players. As a practical result the Twenty-four Characteristic Studies contained in this book, while of difficult grade, have been adapted from existing violin studies.
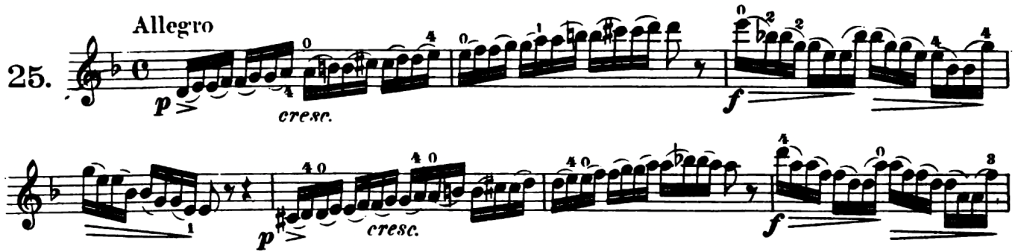
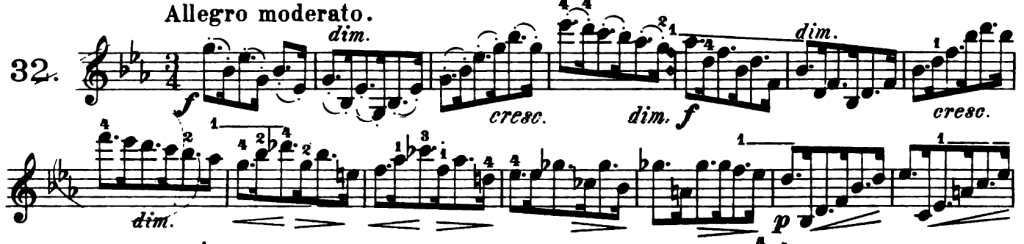
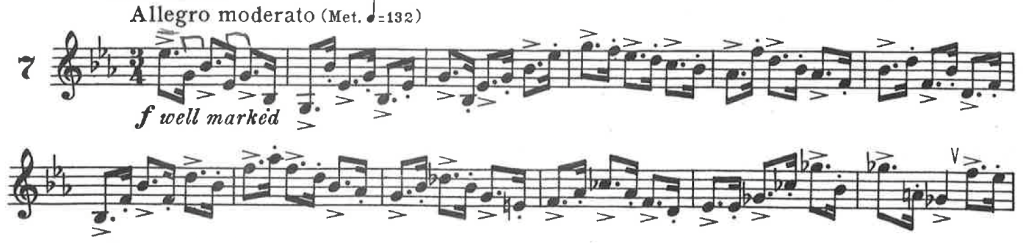
In fact, Clarke’s inspiration was Heinrich Ernst Kayser’s book of 36 Studies for violin published in 1848. All but two of Clarke’s etudes (16 and 24) can be traced back to an etude by Kayser.
Clarke/Kayser Comparison Chart
ClarkeEtude
Key
Marking
KayserEtude
Key
Marking
1
C Major
Allegro moderato
4
C Major
Allegro
2
a minor
Allegro
28
a minor
Allegro assai
3
D-flat Major
Allegro risoluto
11
E-flat Major
Allegro energico
4
b-flat minor
Allegro misterioso
25
d minor
Allegro
5
D Major
Moderato energico
8
D Major
Commodo
6
b minor
Moderato marcato
19
b minor
Allegro
7
E-flat Major
Allegro moderato
32
E-flat Major
Allegro moderato
8
c minor
Allegro agitato
6
c minor
Allegro molto
9
E Major
Allegretto guisto
3
F Major
Allegretto
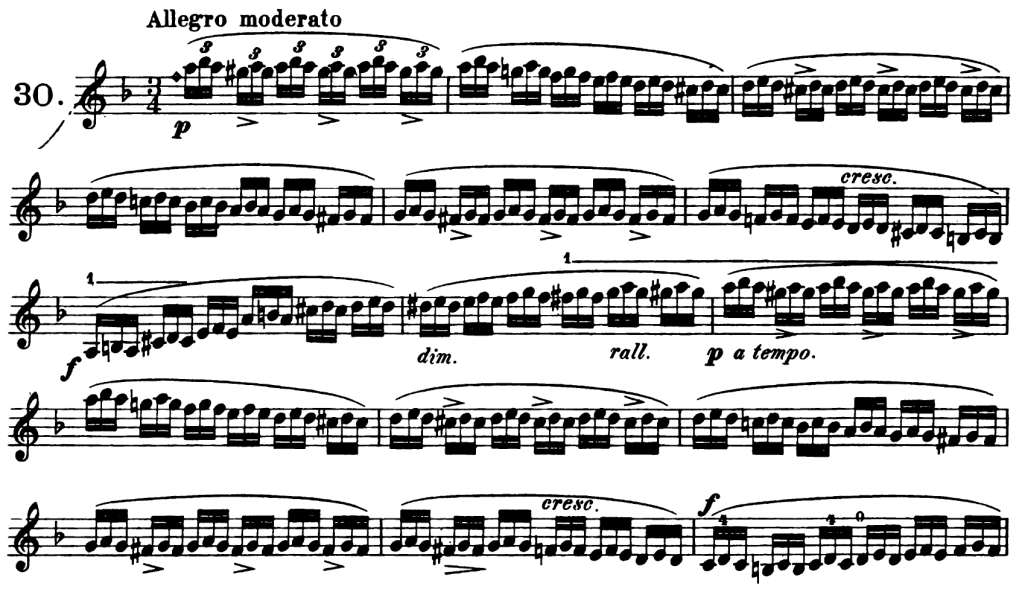
10
c-sharp minor
Allegro moderato
30
d minor
Allegro moderato
11
F Major
Allegretto
13
G Major
Allegretto
12
d minor
Allegro moderato
15
B-flat major
Allegro moderato
13
F-sharp Major
Vivace
22
E Major
Allegro assai
14
e-flat minor
Allegretto con moto
18
G Major
Allegretto
15
G Major
Allegro ma non troppo
12
G Major
Allegro, ma non tanto
16
e minor
Tempo di Bolero
Appears to be original to Clarke
17
A-flat Major
Moderato
31
A-flat Major
Allegro molto agitato
18
f minor
Moderato
23
f minor
Allegretto
19
A Major
Allegro vivace
27
A Major
Allegro vivace
20
f-sharp minor
Furioso
21
E-flat Major
Allegro
21
B-flat Major
Moderato
10
C Major
Allegro, ma non tanto
22
g minor
Allegretto
35
b minor
Allegro con fuoco
23
B Major
Moderato
29
C Major
Moderato
24
g-sharp minor
Andante cantabile
Appears to be original to Clarke
Examples for Comparison
Continuing in the introduction to the Characteristic Studies, Clarke emphasizes several goals of the studies including:
…absolute control of technic, articulation, slurring and endurance….
…[the studies] will help the student play with comfort and ease….
Cornet players should…try to demonstrate their own musical and artistic individuality.
Once you’ve become familiar with all of your major and minor scales*, it’s a good idea to keep playing them often. Here’s a plan that can help you do that. Rather than going around the circle of fifths or chromatically, we’ll follow this sequence of scales:
Parallel Major → Relative minor: Natural → Harmonic → Melodic
You’ll notice that if you continued you would be back to where you began. It looks complicated at first but it’s actual quite logical and takes advantage of two important music theory concepts:
The major scale and its relative minor scale in natural form share the same notes, just a different pitch center (aka “tonic” – the first and last note of the scale)
The melodic minor and the parallel major scale share all of the same notes except for the third.
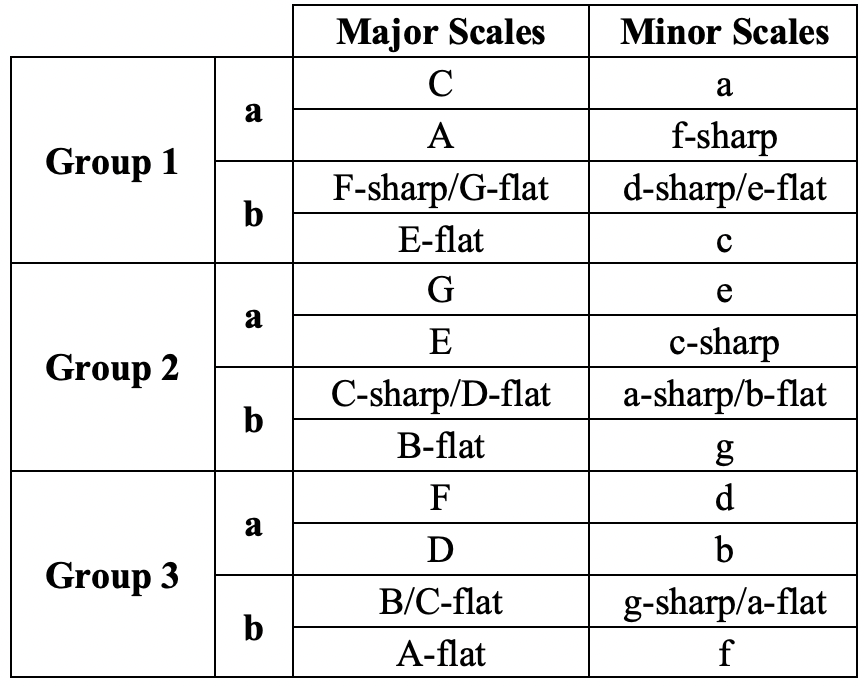
In all, there are three groups of these four major/minor scales. Here is the sequence of the actual scales:
Remember, each minor scale should be played in three forms (natural, harmonic, and melodic). For example, group 1 would be:
C Major → a natural → harmonic → melodic minor →
A Major → f♯ natural → harmonic → melodic minor →
F♯/G♭ Major → d♯/e♭ natural → harmonic → melodic minor →
E♭ Major scale → c natural → harmonic → melodic minor
One of the nice things about this system is that it pairs scales that tend to be more familiar (like C or F) with those that are likely to be less familiar (like F♯ or C♭).
Depending on your facility with all of these scales (and practice time available), you can fit them in a six day practice week routine by doing them all either once a week, twice a week, or every day. Here are the three options in a schedule:
Tips:
Don’t forget to play these with a metronome. Regardless of whether you can play them fast or slow, it will help you chart your progress and develop consistency.
Play each scale in one breath. This forces you to maintain a steady tempo and develops consistency of approach.
Rather than starting scales from the bottom (up and back down again), try starting them from the top (down and back up again). Why? It develops a different kind of familiarity with the scales and increases your confidence in starting in the upper register.
Vary the articulation in every way imaginable, especially when you start knocking these all out every day.
*Use this handy Scale Journal to keep track of your progress learning your major and minor scales. It’s best to memorize your scales, but if you’re not there yet here are scale sheets for major scales and minor scales.